Slideshow with thematic images in the article or in the full news without third-party plugins.
And so, an instruction, a guide, a master class, as anyone likes, on creating a slideshow in an article to illustrate content, emphasize its semantic load, form the aesthetics of the site using Out of the Box tools, without installing new extensions.
Experienced users and administrators of Cotonti sites, please do not swear - this manual is written for the most part for those who are just starting to learn Cotonti Siena.
What will we need?
1. Installed module "PFS".
Read about installation and configuration at the link.
2. Installed module "Page".
3. To know where in the admin panel Extra fields.
4. Be able to use some code editing programs, for example "Notepad++" and to access site files FTP manager - for example "FileZilla Client".
5. Connected toolkit library for creating interfaces - Bootstrap 5.3. compiled files (Compiled CSS and JS)
(If anyone does not know how to connect - create a separate topic on the forum).
Let's go
Extrafields.
We go into the extrafields of the "Page" module:
Administration panel / Other / Extra fields / Table cot_pages - Pages module
or if it's easier for someone on the link:
https://Your_Project.com/admin.php?m=extrafields&n=cot_pages
* Your_Project.com - replace with your site's domain
click on the picture to view in full size
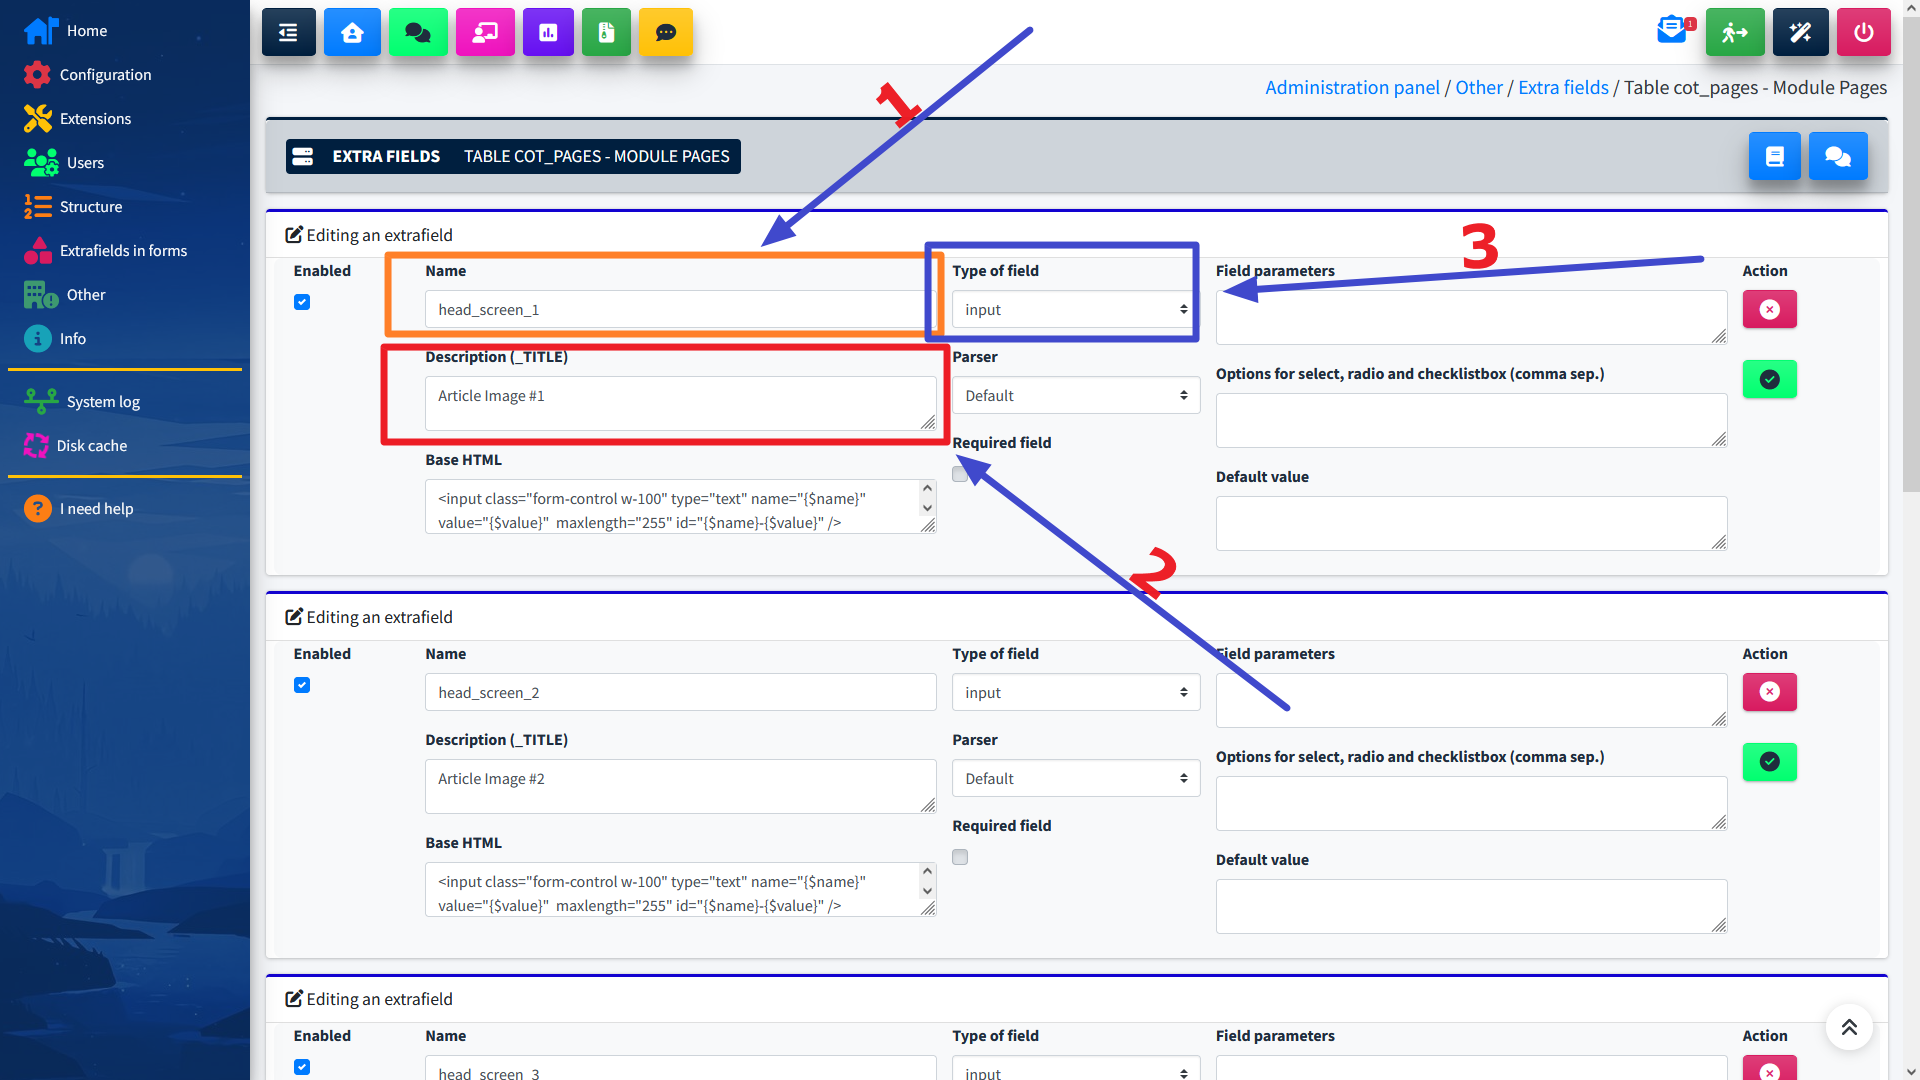
We create three extrafields:
For each "field_type" or "Type of field" set - "input".
"HTML-code of the field" or "Base HTML" - we do not prescribe anything here, by default it is filled in automatically.
The first extrafield for the first picture.
For the first picture in the slideshow, write:
in "field_name" or "Name" - "head_screen_1"
in "field_description" or "Description(_TITLE)" - "Article Image #1"
The second extrafield for the second picture.
For the second picture in the slideshow, write:
in "field_name" or "Name" - "head_screen_2"
in "field_description" or "Description(_TITLE)" - "Article image #2"
The third extrafield for the third picture.
For the third image in the slideshow, write:
in "field_name" or "Name" - "head_screen_3"
in "field_description" or "Description(_TITLE)" - "Article Image #3"
Or like this, I think it will be more clear to show, fill in only two lines and control "Field type" - "input"
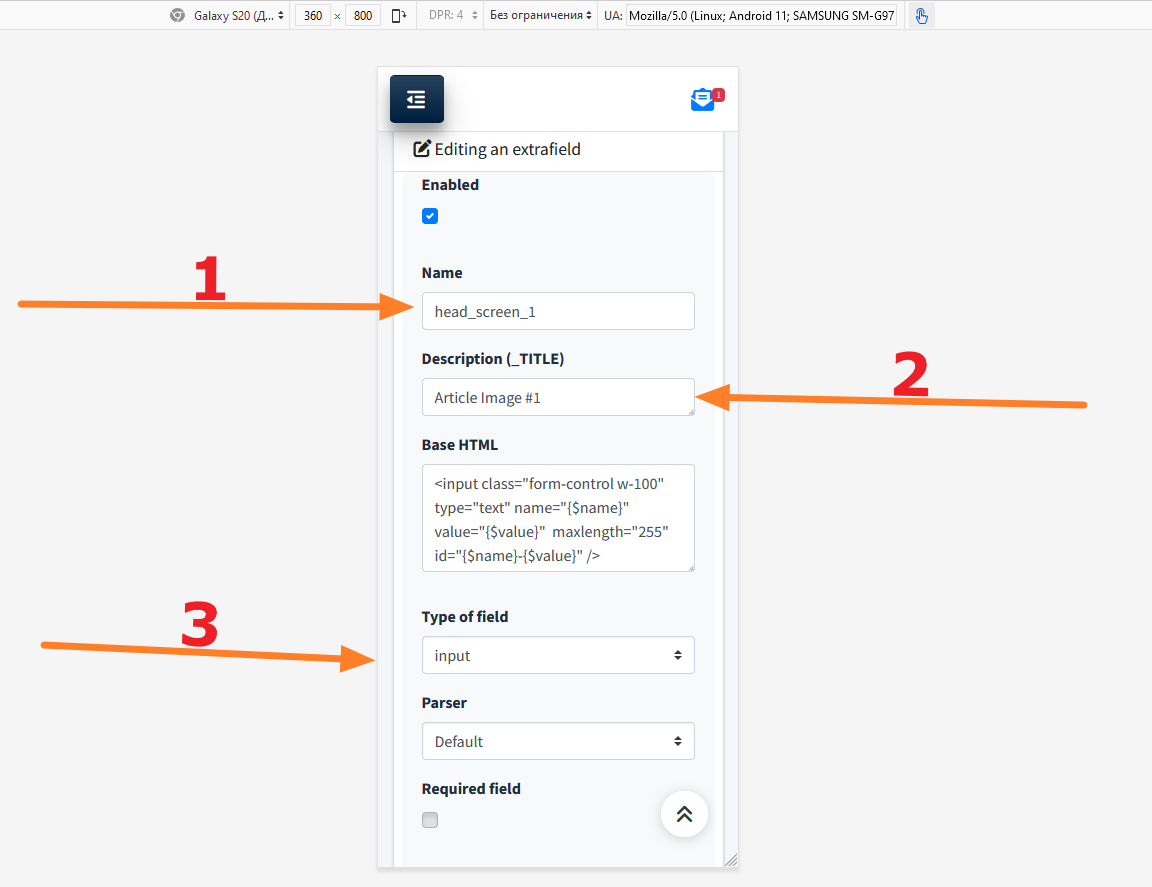
That's all for extrafields!
Moving on to our "Page" module templates,
they must be located in the appropriate folder of your frontend theme (skin), namely at:
"themes/yourtheme_folder/modules/page".
(we read about how to put them there correctly here, paragraph "Customization, that is, setting and changing the appearance of templates")
Open the template for adding page page.add.tpl
We find where the PFS module is registered in our template, this is {PAGEADD_FORM_PFS}.
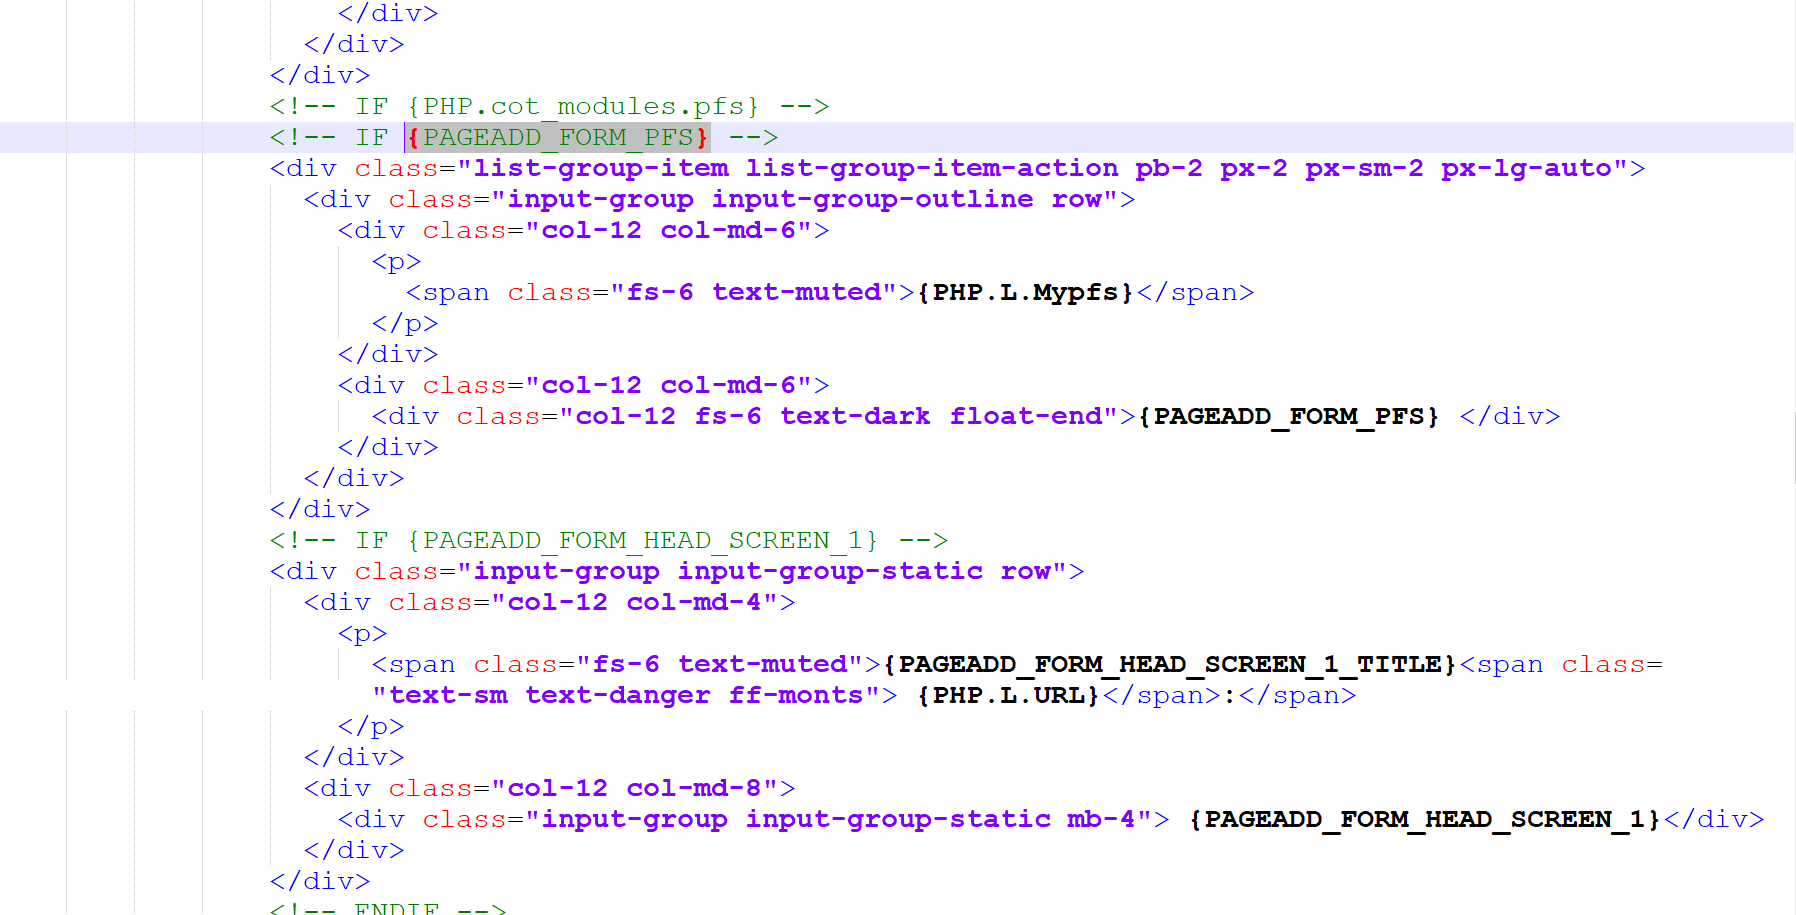
It doesn’t matter if it is registered or not, we “put” the code on top of it, which is below:
!!! I draw your attention, all the code in this material requires the connected library "Bootstrap 5.3"
<!-- IF {PHP.cot_modules.pfs} -->
<!-- IF {PAGEADD_FORM_PFS} -->
<div class="list-group-item list-group-item-action pb-2 px-2 px-sm-2 px-lg-auto mb-3">
  <div class="input-group input-group-outline row">
	<div class="col-12 col-md-6">
	  <p>
		<span class="fs-6 text-muted">{PHP.L.Mypfs}</span>
	  </p>
	</div>
	<div class="col-12 col-md-6">
	  <div class="col-12 fs-6 text-dark float-end">{PAGEADD_FORM_PFS} </div>
	</div>
  </div>
<!-- IF {PAGEADD_FORM_HEAD_SCREEN_1} -->
<div class="input-group input-group-static row">
  <div class="col-12 col-md-4">
	<p>
	  <span class="fs-6 text-muted">{PAGEADD_FORM_HEAD_SCREEN_1_TITLE}<span class="text-danger"> {PHP.L.URL}</span>:</span>
	</p>
  </div>
  <div class="col-12 col-md-8">
	<div class="input-group input-group-static mb-4"> {PAGEADD_FORM_HEAD_SCREEN_1}</div>
  </div>
</div>
<!-- ENDIF -->
<!-- IF {PAGEADD_FORM_HEAD_SCREEN_2} -->
<div class="input-group input-group-static row">
  <div class="col-12 col-md-4">
	<p>
	  <span class="fs-6 text-muted">{PAGEADD_FORM_HEAD_SCREEN_2_TITLE}<span class="text-danger"> {PHP.L.URL}</span>:</span>
	</p>
  </div>
  <div class="col-12 col-md-8">
	<div class="input-group input-group-static mb-4"> {PAGEADD_FORM_HEAD_SCREEN_2}</div>
  </div>
</div>
<!-- ENDIF -->
<!-- IF {PAGEADD_FORM_HEAD_SCREEN_3} -->
<div class="input-group input-group-static row">
  <div class="col-12 col-md-4">
	<p>
	  <span class="fs-6 text-muted">{PAGEADD_FORM_HEAD_SCREEN_3_TITLE}<span class="text-danger"> {PHP.L.URL}</span>:</span>
	</p>
  </div>
  <div class="col-12 col-md-8">
	<div class="input-group input-group-static mb-4"> {PAGEADD_FORM_HEAD_SCREEN_3}</div>
  </div>
</div>
</div>
<!-- ENDIF -->
<!-- ENDIF -->
<!-- ENDIF -->
We save our template for adding a page "page.add.tpl".
Now we create a page, a link to create a new page is usually on any page or article.
Or go directly to the link:
https://Your_Project.com/index.php?e=page&m=add
* Your_Project.com - replace with your site's domain
We fill in all the fields and go to the newly created fields for the pictures of our slider.
If everything is done correctly, you will see something like in the screenshot below.
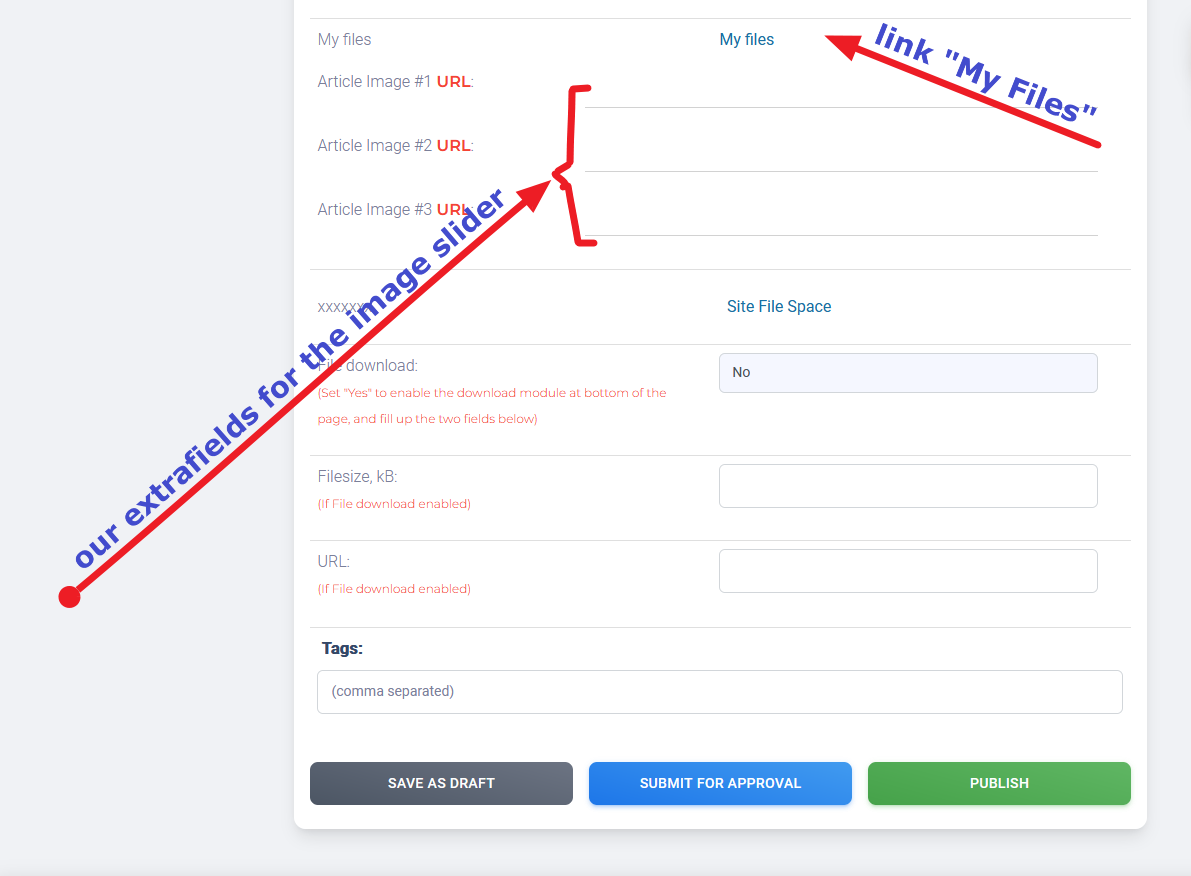
Click on the link "My Files".
In the browser window that opens, create a new folder "Article with slider".
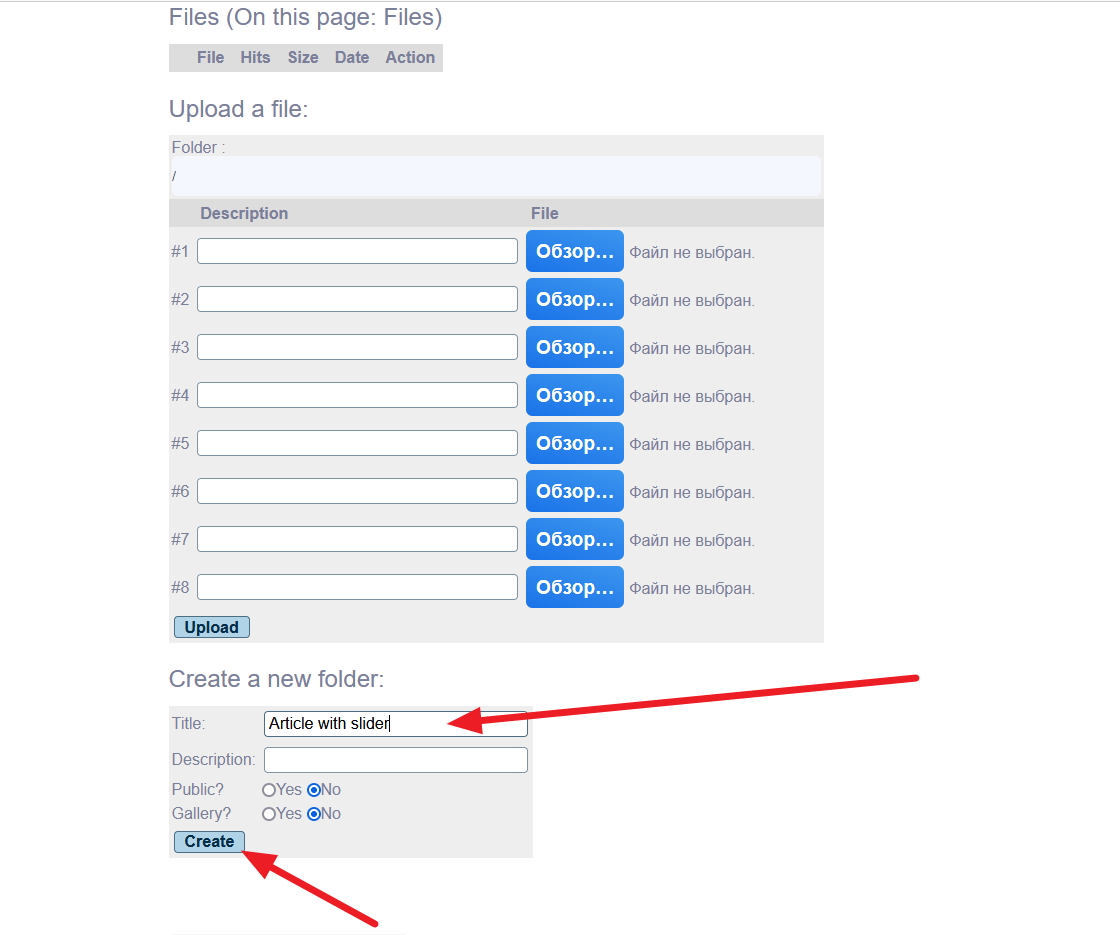
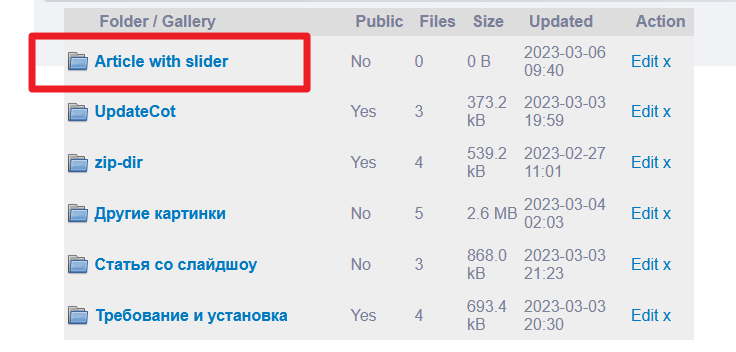
After creating a new folder, it will appear in the list at the top of the page.
Open the "Article with slider" folder and by clicking on the "Browse" button we load three pictures of the same size from the computer, for example, 640 by 420 pixels (px).
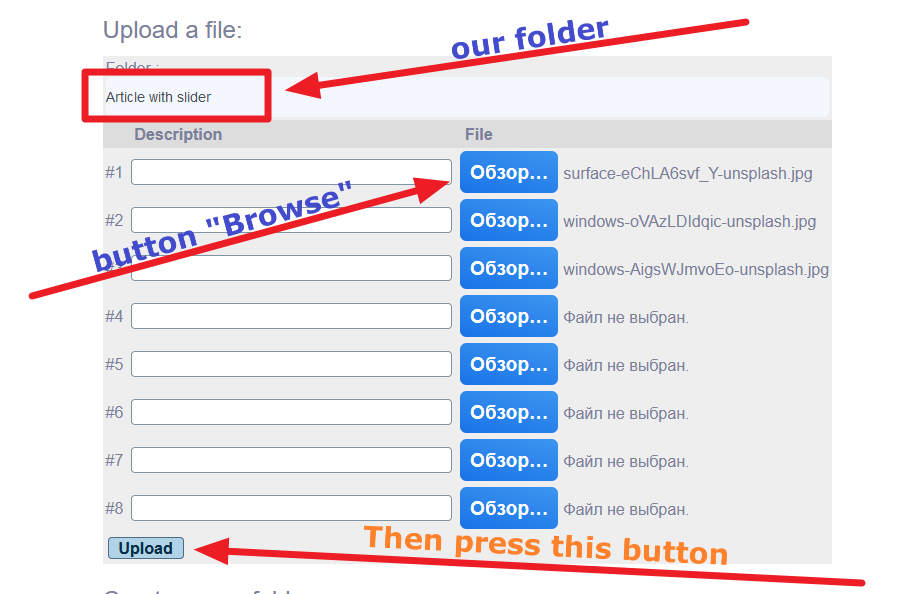
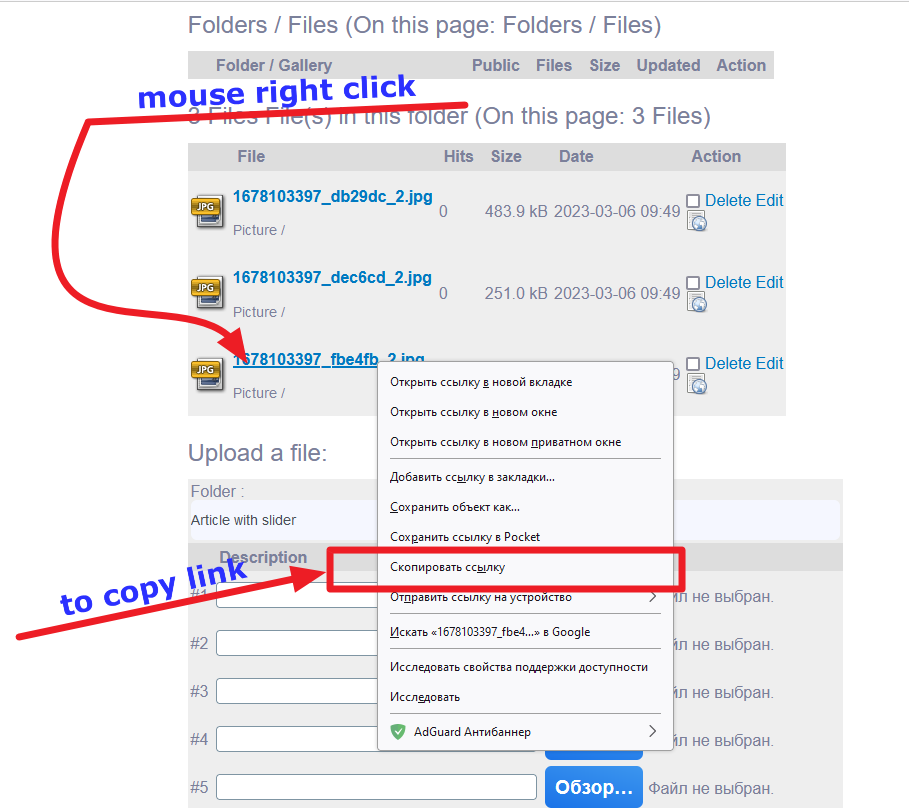
After clicking on the "Upload" button, and after uploading the pictures, we will find ourselves in the "Article with slider" folder, where we see three links to our pictures.
Copy these links as in the screenshot below.
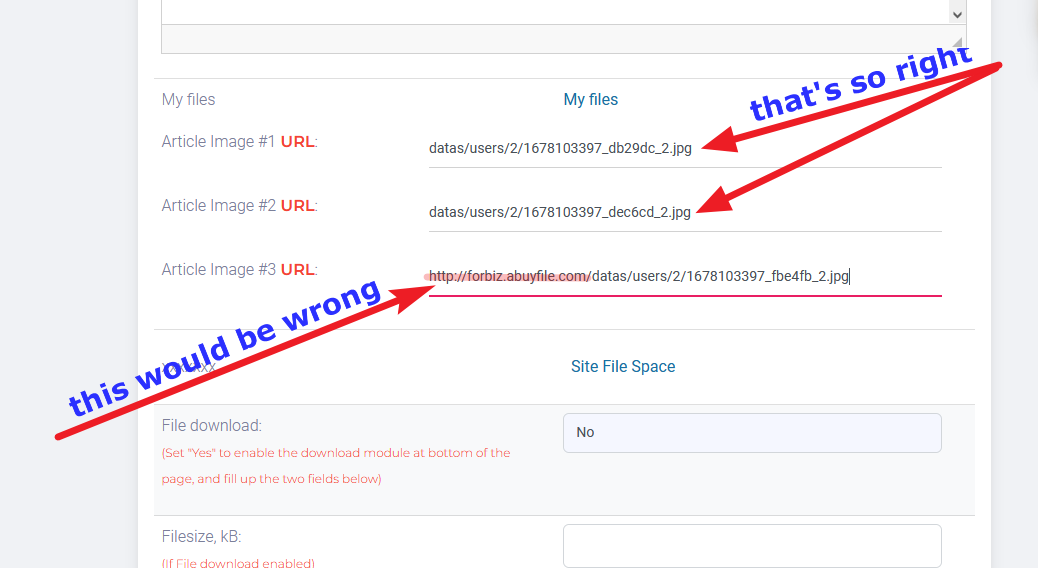
We insert links into our created extrafields for pictures of the slideshow.
!!! But pay attention!
At this stage, inserting a link in each field, you need to remove the site address, including the slash ("/" sign), which is located immediately after the name of your site's domain zone - ru, com, net, ...
see screenshot below.
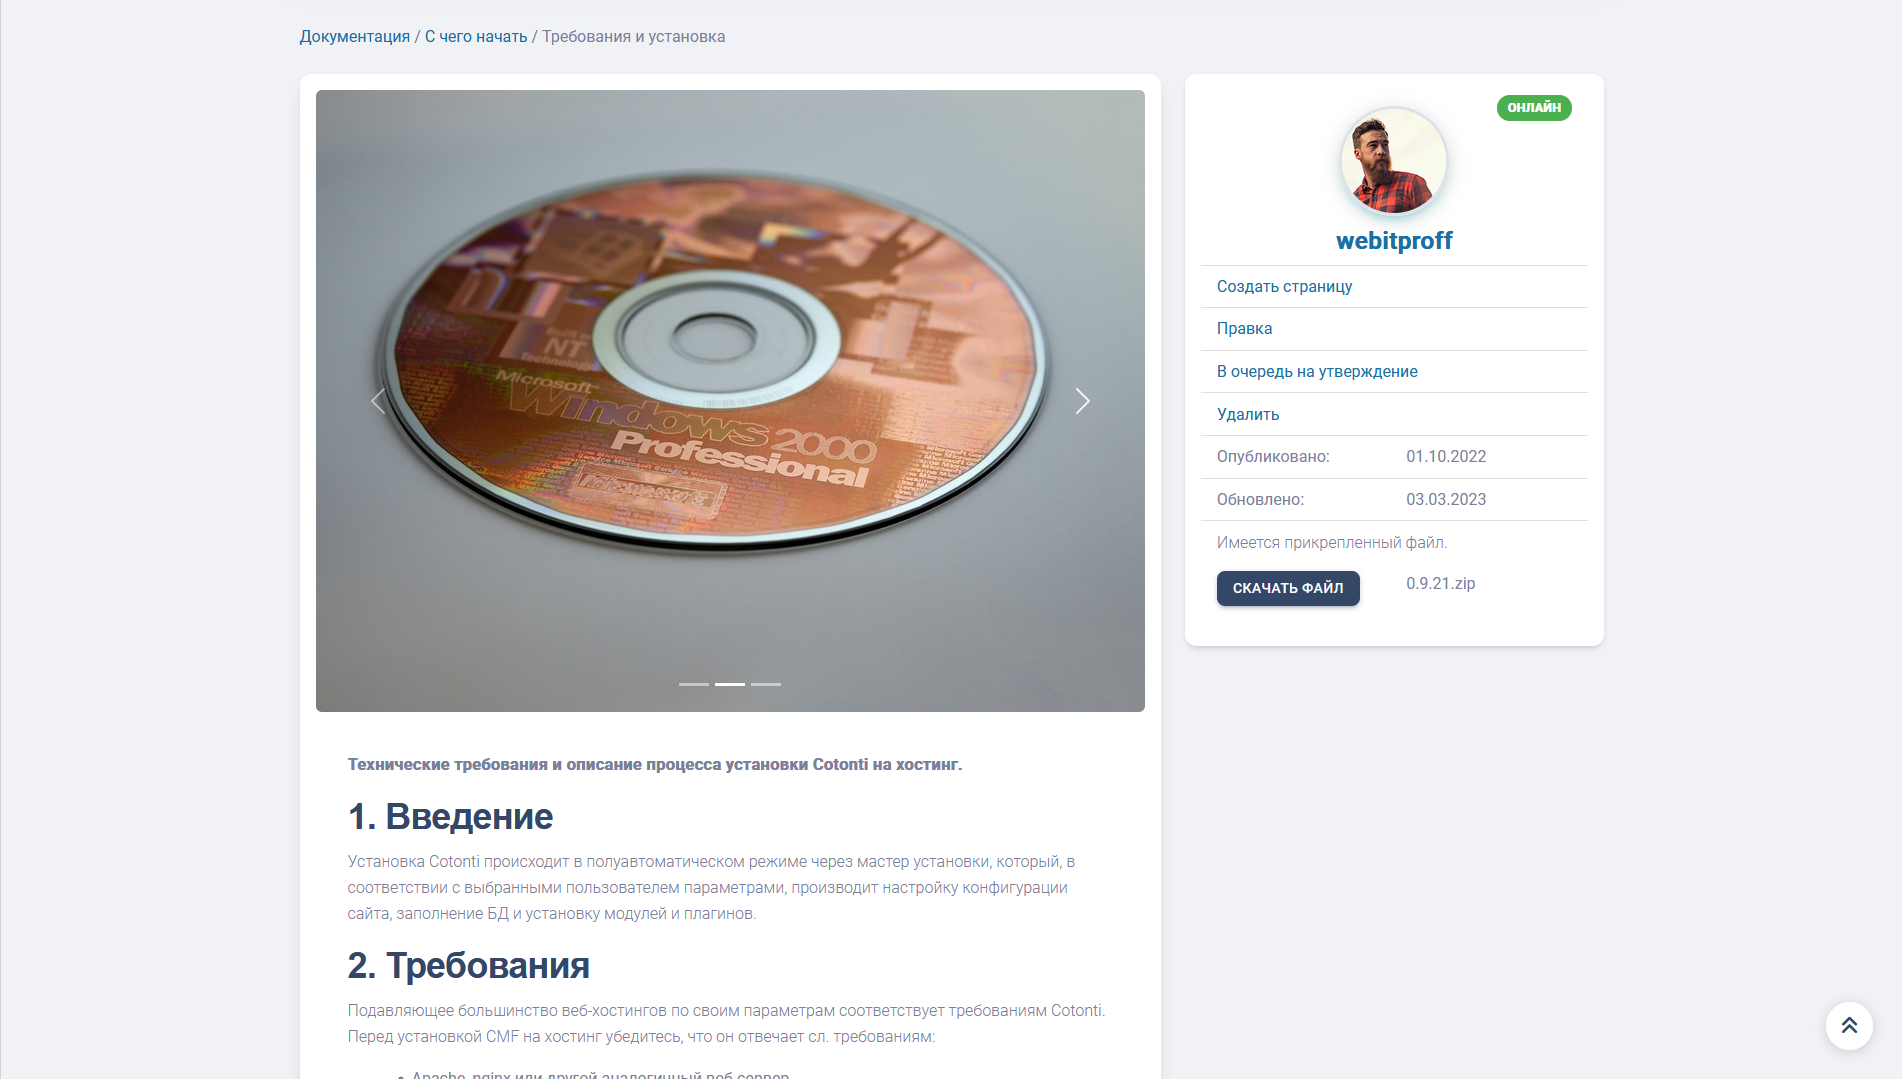
Now when all the fields of the page creation form are filled in and the links to the pictures of the slideshow are spelled out correctly, we press the "Publish" button.
Our new page has opened, but there is no image slider in the article....![]()
Open the full news/article template "page.tpl",
which must be located in the folder of your theme (skin) of the frontend, namely at:
"themes/yourtheme_folder/modules/page"
Now in the right place, usually above the block with text, paste the code below:
<!-- IF {PHP.pag.page_head_screen_1} OR {PHP.pag.page_head_screen_2} OR {PHP.pag.page_head_screen_3} -->
<!-- the slider block is shown if at least one picture is attached -->
<div class="card-header p-0 mx-3 my-3 position-relative z-index-1">
  <div id="carouselExampleIndicators" class="carousel slide">
    <div class="carousel-indicators">
	<!-- IF {PAGE_HEAD_SCREEN_1} -->
	<!-- in case there are less than three pictures -->
      <button type="button" data-bs-target="#carouselExampleIndicators" data-bs-slide-to="0" class="active" aria-current="true" aria-label="Slide 1"></button>
	 <!-- ENDIF -->
	 <!-- IF {PAGE_HEAD_SCREEN_2} -->
	 <!-- in case there are less than three pictures -->
      <button type="button" data-bs-target="#carouselExampleIndicators" data-bs-slide-to="1" aria-label="Slide 2"></button>
	  <!-- ENDIF -->
	  <!-- IF {PAGE_HEAD_SCREEN_3} -->
	  <!-- на случай, если картинок меньше трех -->
      <button type="button" data-bs-target="#carouselExampleIndicators" data-bs-slide-to="2" aria-label="Slide 3"></button>
	  <!-- ENDIF -->
    </div>
    <div class="carousel-inner">
	<!-- IF {PAGE_HEAD_SCREEN_1} -->
	<!-- in case there are less than three pictures -->
      <div class="carousel-item active shadow ">
        <img src="{PHP.cfg.mainurl}/{PAGE_HEAD_SCREEN_1}" class="d-block w-100 img-fluid border-radius-md" alt="{PAGE_SHORTTITLE}" loading="lazy">
      </div>
	  <!-- ENDIF -->
	  <!-- IF {PAGE_HEAD_SCREEN_2} -->
	  <!-- in case there are less than three pictures -->
      <div class="carousel-item">
        <img src="{PHP.cfg.mainurl}/{PAGE_HEAD_SCREEN_2}" class="d-block w-100 img-fluid border-radius-md" alt="{PAGE_SHORTTITLE}" loading="lazy">
      </div>
	  <!-- ENDIF -->
	  <!-- IF {PAGE_HEAD_SCREEN_3} -->
	  <!-- in case there are less than three pictures -->
      <div class="carousel-item">
        <img src="{PHP.cfg.mainurl}/{PAGE_HEAD_SCREEN_3}" class="d-block w-100 img-fluid border-radius-md" alt="{PAGE_SHORTTITLE}" loading="lazy">
      </div>
	  <!-- ENDIF -->
    </div>
    <button class="carousel-control-prev" type="button" data-bs-target="#carouselExampleIndicators" data-bs-slide="prev">
      <span class="carousel-control-prev-icon" aria-hidden="true"></span>
      <span class="visually-hidden">Previous</span>
    </button>
    <button class="carousel-control-next" type="button" data-bs-target="#carouselExampleIndicators" data-bs-slide="next">
      <span class="carousel-control-next-icon" aria-hidden="true"></span>
      <span class="visually-hidden">Next</span>
    </button>
  </div>
</div>
<!-- ENDIF -->
Save our full news/page template "page.tpl"
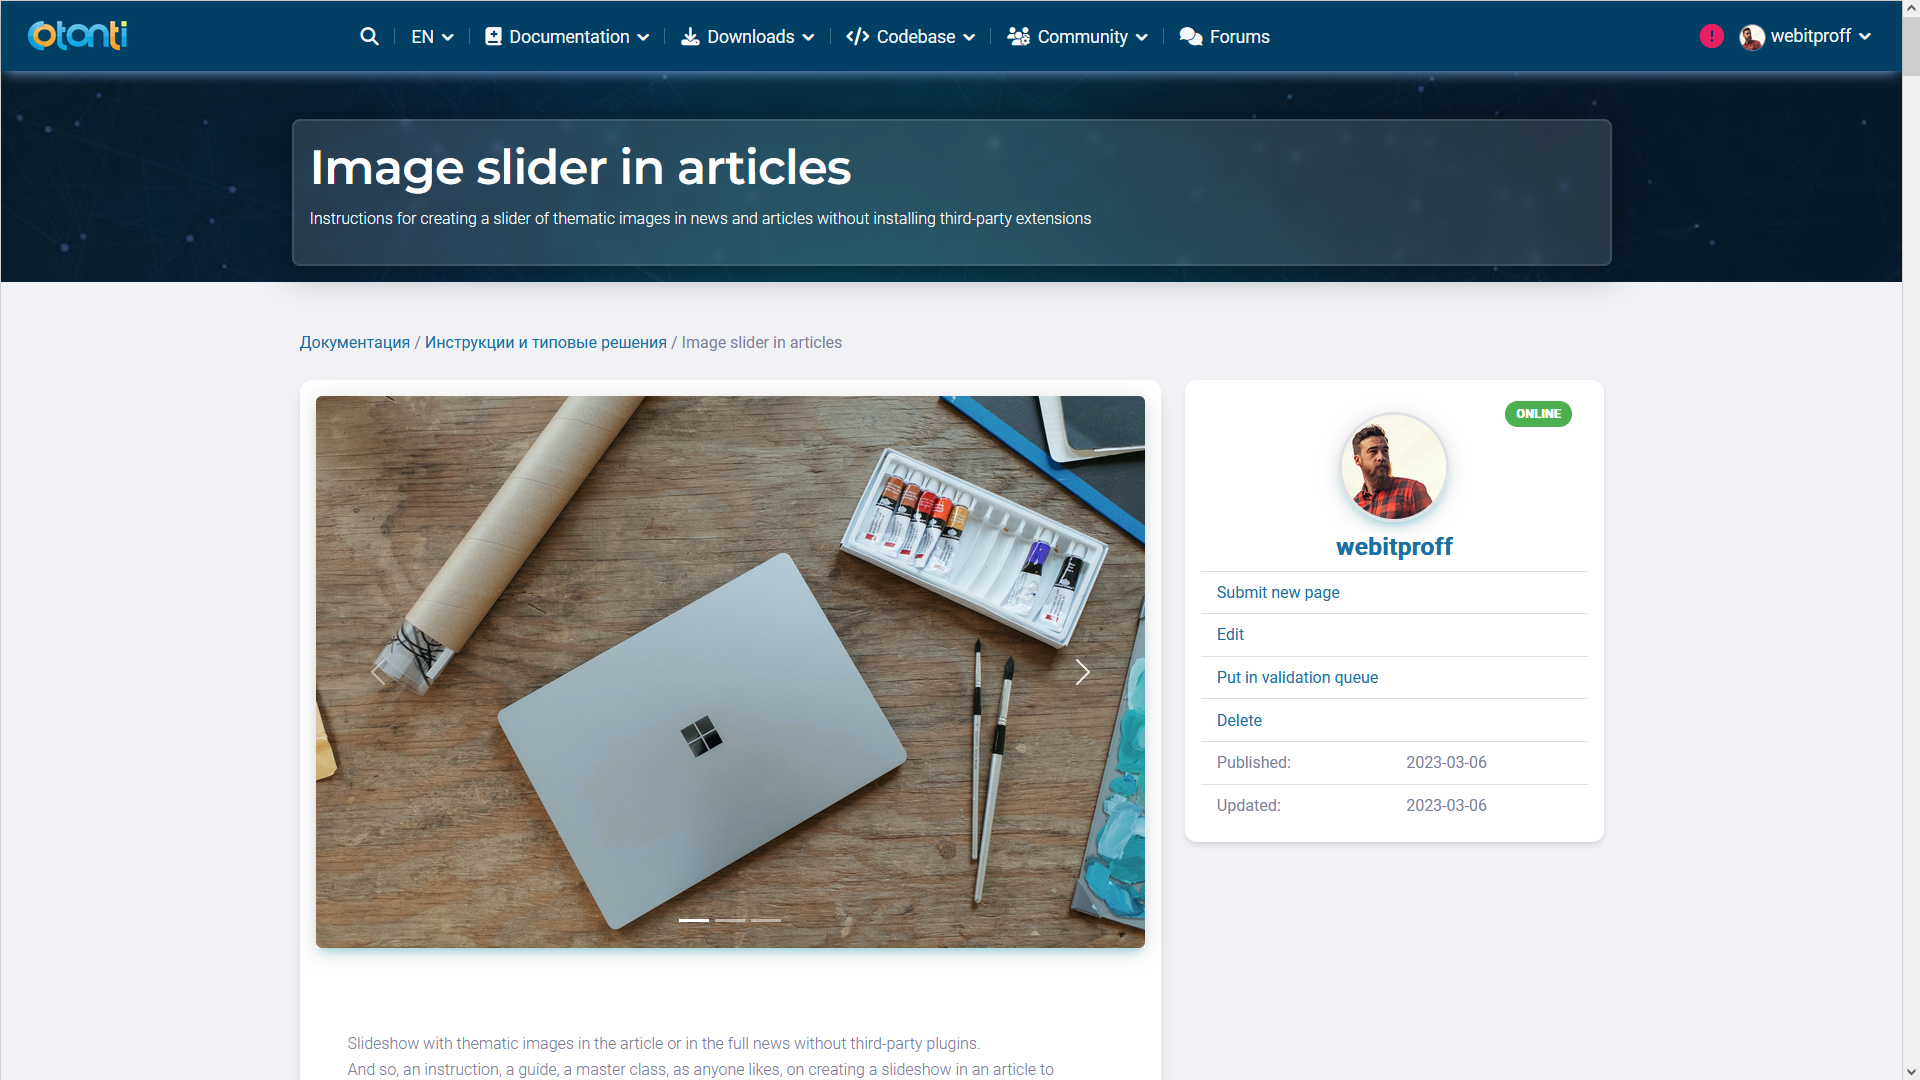
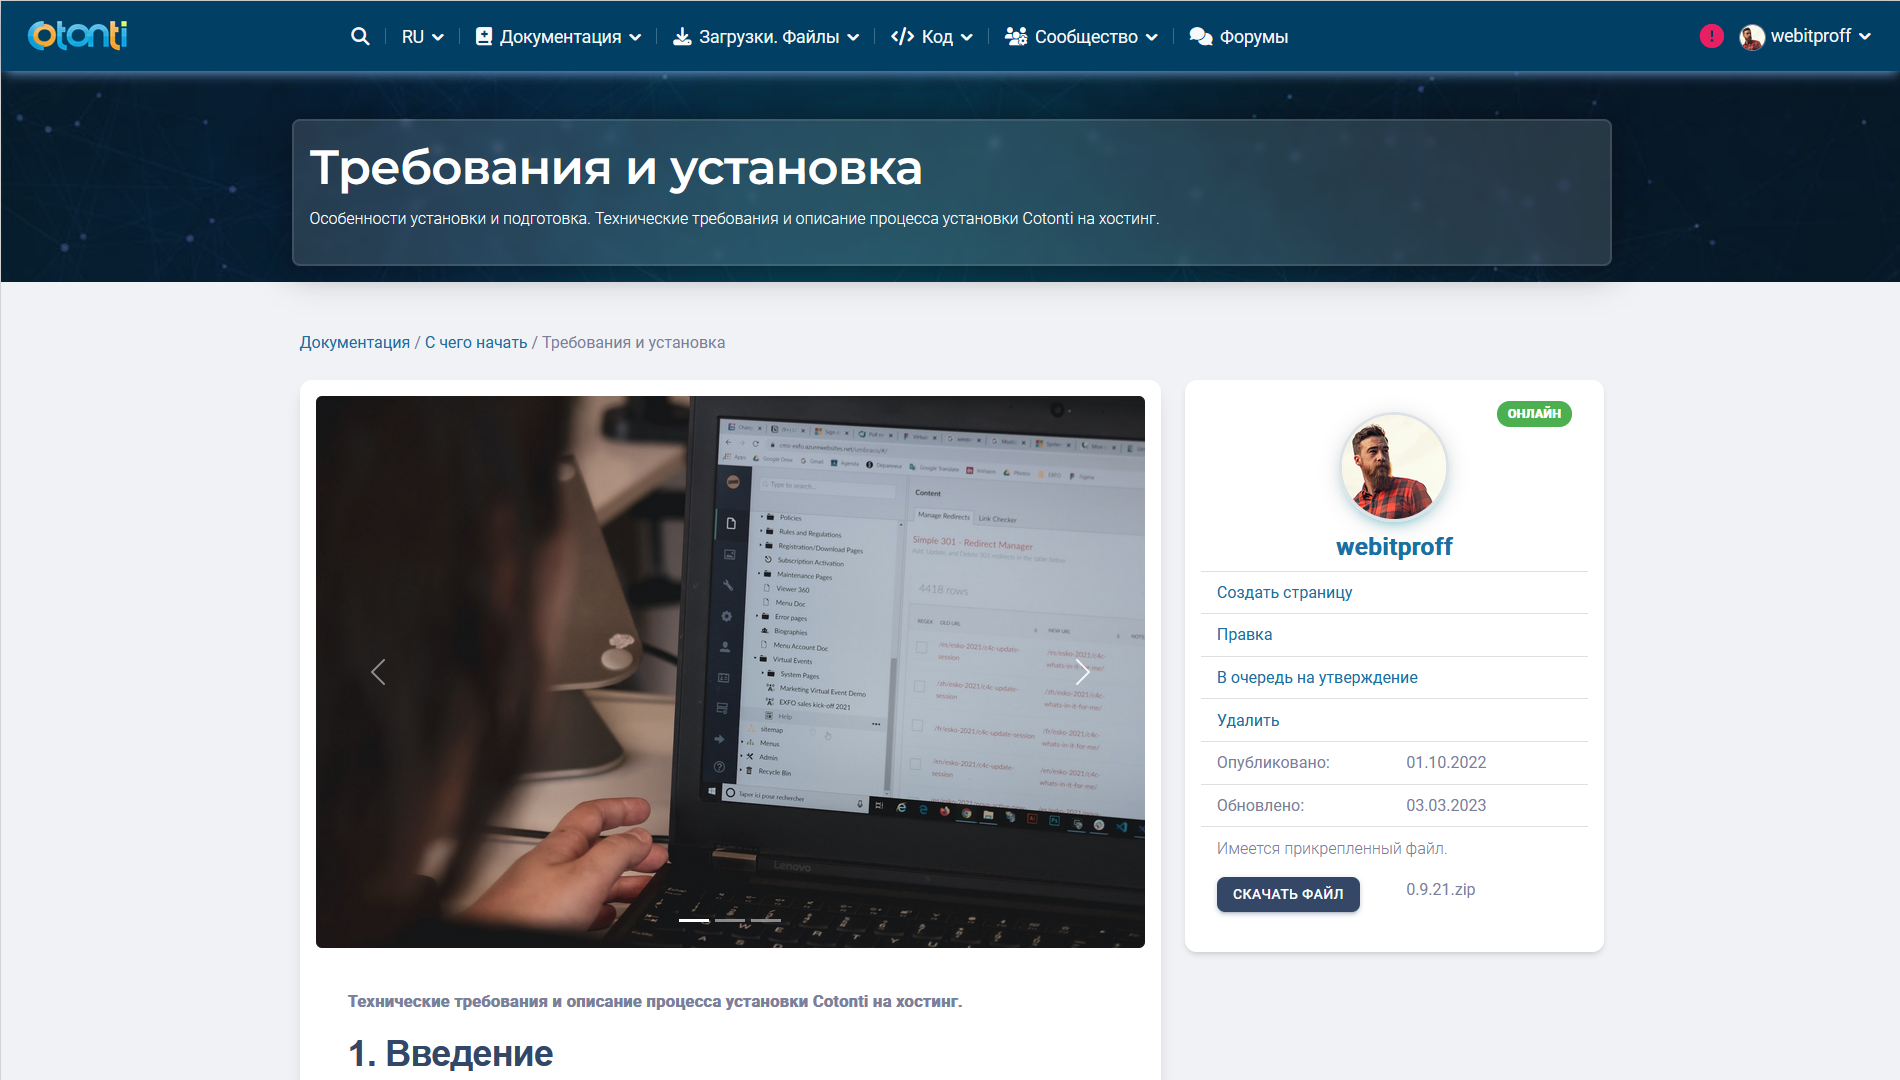
Now we reload our article / news, to which we added pictures for the slider.
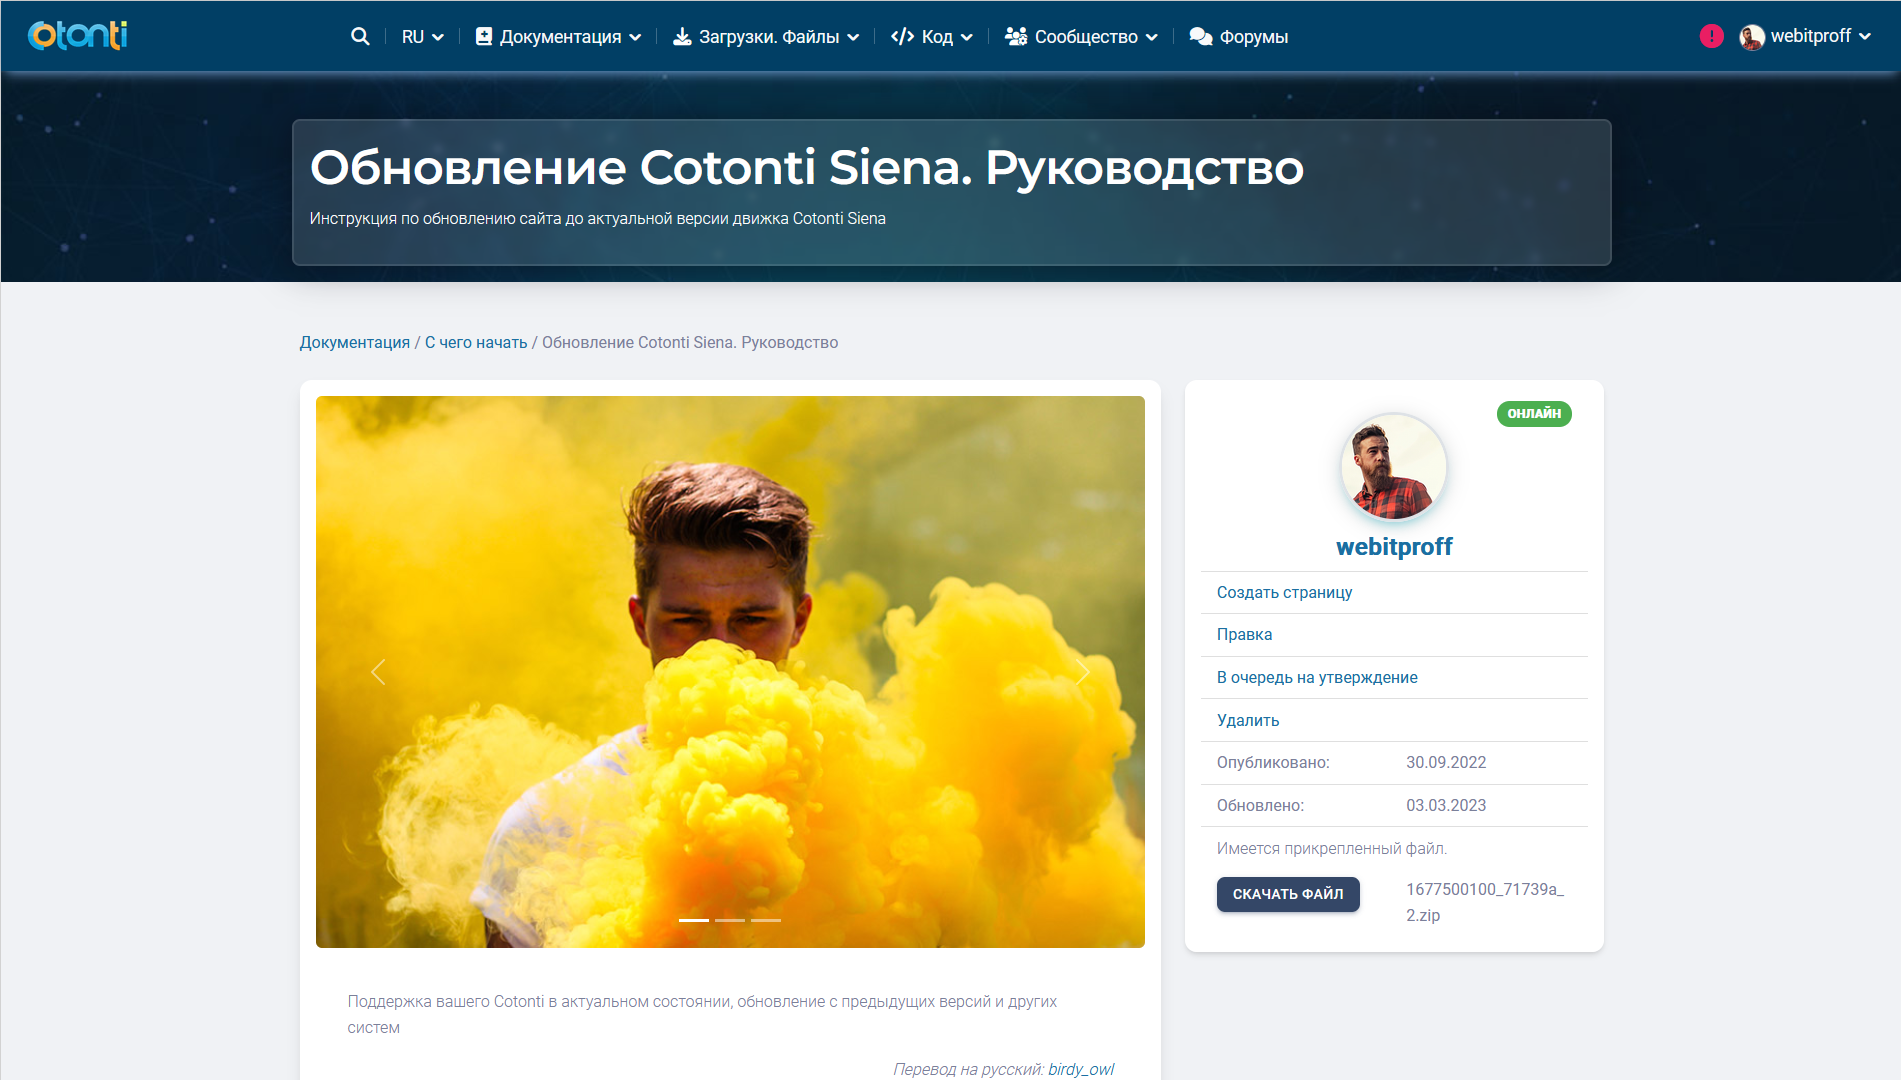
If everything is done clearly according to the instructions, the result will be as in the screenshots below, and yet, for now, at the moment it can be seen in work here.
If you are using the UIkit3 library, slideshow documentation is here. If it does not work, write in this thread - I'll tell you.
After a little manipulation with the "header.tpl" template
    <meta property="og:locale" content="{PHP.lang}" />
    <meta property="og:type" content="article" />
    <meta property="og:title" content="{HEADER_TITLE}" />
    <meta property="og:description" content="{HEADER_META_DESCRIPTION}" />
    <meta property="og:url" content="{HEADER_CANONICAL_URL}" />
    <meta property="og:site_name" content="{PHP.cfg.maintitle}" />
	<!-- IF {PHP.env.ext} == 'page' AND {PHP.env.location} == 'pages' -->
	<meta property="og:image" content="{PHP.cfg.mainurl}/{PHP.pag.page_head_screen_1}" />
	<!-- ELSE -->
	<meta property="og:image" content="{PHP.cfg.mainurl}/apple-touch-icon.png}" />
	<!-- ENDIF -->
    <meta property="og:image:type" content="image/jpeg" />
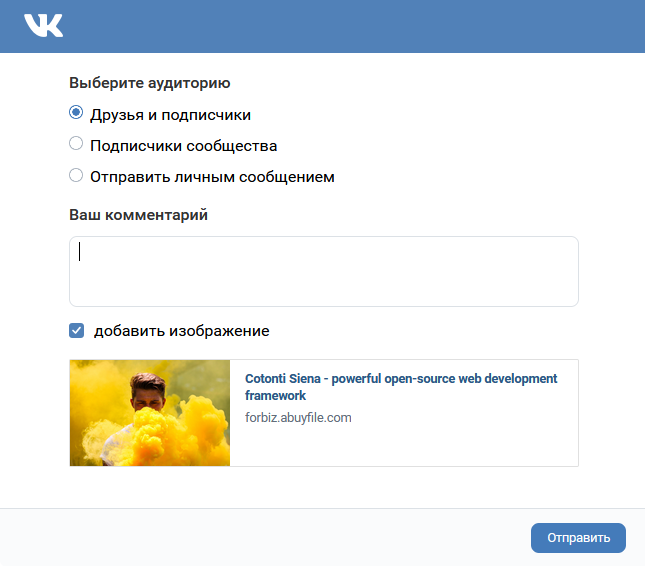
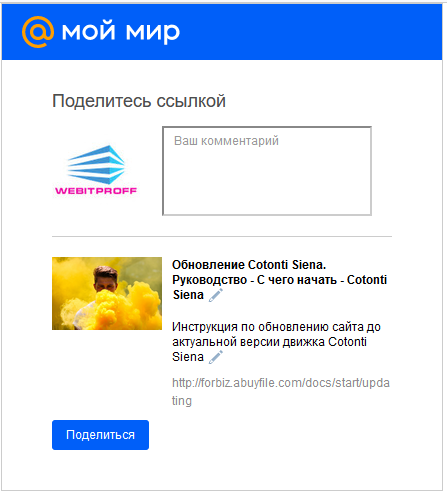
we can achieve that when "sharing" this page in social networks and instant messengers, it would pull up the first picture of our news or article.
Like this in telegram

Like this in facebook

Like this in "VK"
Like this in "mail ru"
if it was useful and helped you, click "thank you" ![]()
I wish you successful and colorful projects, and take care of yourself! ![]()
please forgive me for my english ![]()


48 mal
Плохо, что нет единой системы для файлов. PFS / ATTACH2 / FILES
102 mal
RU
По большому счету, для решения основных задач с прикреплением файлов к статьям и постам форума, достаточно только модуля PFS. Для этого как в этой статье с инструкцией достаточно создать несколько экстраполей, и подключить уже готовую и актуальную библиотеку построения интерфейсов как bootstrap 5.3, UIkit 3, или любую другую, какая вам больше нравится.
Подчеркну, для основных задач, модуля PFS, который встроен в движок сайта будет предостаточно.
Важно понимать цели и задавать правильные вопросы, для это и есть форум и тема обсуждения.
А вот уже для базовых и более специфических задач, когда нужно проявить гибкость, некую изворотливость или изощренность, выйти за рамки базового функционала Cotonti, - есть сторонние расширения, совершенно бесплатные. В чем собственно и является ценность этой систему управления контентом сайта - каждый по своему усмотрению может расширить функционал сайта бесплатно, в соответствии со своими нуждами и целями.
Формируйте свои цели, задавайте фопросы на форуме, - и вам подскажут и помогут.
EN
By and large, to solve basic tasks with attaching files to articles and forum posts, only the PFS module is enough. To do this, as in this article with instructions, it is enough to create several extrafields, and connect a ready-made and up-to-date interface building library like bootstrap 5.3, UIkit 3, or any other that you like best.
I emphasize that for the main tasks, the PFS module, which is built into the site engine, will be enough.
It is important to understand the goals and ask the right questions, this is what the forum and discussion topic is for.
But for basic and more specific tasks, when you need to show flexibility, some resourcefulness or sophistication, go beyond the basic functionality of Cotonti, there are third-party extensions, completely free. What actually is the value of this site content management system - everyone, at their own discretion, can expand the functionality of the site for free, in accordance with their needs and goals.
Form your goals, ask questions on the forum - and you will be prompted and helped.