For this tutorial I'm using Cotonti Siena 0.9.0, the Nemesis-theme, Pageavatar-plugin and fancybox
1. Installing Pageavatar for Siena: more details
2. Configuring Pageavatar for Siena: more details
Goto: http://www.yoursite.com/admin.php?m=config&n=edit&o=plug&p=pageavatar
For this tutorial I used: all|datas/photos|thumb250_-250-250|0||crop
3. Making pagecategories for the gallery
Goto http://www.yoursite.com/admin.php?m=structure&n=page
For this tutotial I used the following:
Make sure that all subcategories of the gallery are pointing to the template of gallery
Click on options of the subcatergory.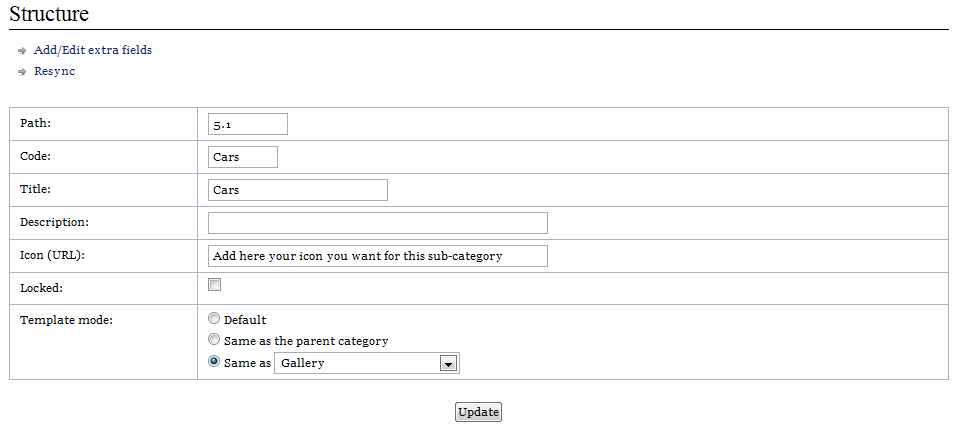
I also added a url to a Icon. This icon will be used to display the category.
4. Copy the fancybox directory to your root-directory: http://fancybox.net/
5. Adding some TPL-templates for the gallery.
Make a copy from:
- page.add.tpl and rename the copy to page.add.gallery.tpl
- page.edit.tpl and rename the copy to page.edit.gallery.tpl
- page.tpl and rename the copy to page.gallery.tpl
- page.list.tpl and rename the copy to page.list.gallery.tpl
In page.add.gallery.tpl, add the part like discribed in installing Pageavatar:
<tr>
<td>{PAGEADD_FORM_AVATAR_TITLE}:</td>
<td>{PAGEADD_FORM_AVATAR}</td>
</tr>
In page.edit.gallery.tpl, add the part like discribed in installing Pageavatar:
<tr>
<td>{PAGEEDIT_FORM_AVATAR_TITLE}:</td>
<td>
{PAGEEDIT_FORM_AVATAR}
<!-- IF {PAGEEDIT_FORM_AVATARFILE} --><p>{PHP.L.Uploaded}: {PAGEEDIT_FORM_AVATARFILE}<br /> {PHP.L.Delete}: {PAGEEDIT_FORM_AVATARDELETE}</p><!-- ENDIF -->
</td>
</tr>
In page.gallery.tpl add before {PAGE_TEXT} the following:
<!-- IF {PAGE_AVATAR} --><a rel="example_group" href="../datas/photos/{PAGE_AVATAR}" title="{PAGE_SHORTTITLE}"><img src="./datas/photos/thumb250_{PAGE_AVATAR}" alt="{PAGE_SHORTTITLE}" /></a><br \><!-- ENDIF -->
For the fancybox-part we need to add the following, just below <!-- BEGIN: MAIN -->
<script>
!window.jQuery && document.write('<script src="jquery-1.4.3.min.js"><\/script>');
</script>
<script type="text/javascript" src="./fancybox/jquery.mousewheel-3.0.4.pack.js"></script>
<script type="text/javascript" src="./fancybox/jquery.fancybox-1.3.4.pack.js"></script>
<link rel="stylesheet" type="text/css" href="./fancybox/jquery.fancybox-1.3.4.css" media="screen" />
<link rel="stylesheet" href="style.css" />
<script type="text/javascript">
$(document).ready(function() {
/*
* Examples - images
*/
$("a[rel=example_group]").fancybox({
'transitionIn' : 'none',
'transitionOut' : 'none',
'titlePosition' : 'over',
'titleFormat' : function(title, currentArray, currentIndex, currentOpts) {
return '<span id="fancybox-title-over">Image ' + (currentIndex + 1) + ' / ' + currentArray.length + (title.length ? ' ' + title : '') + '</span>';
}
});
});
</script>
In page.list.gallery.tpl we need to add 3 parts:
a. Same script as above just after <!-- BEGIN: MAIN -->
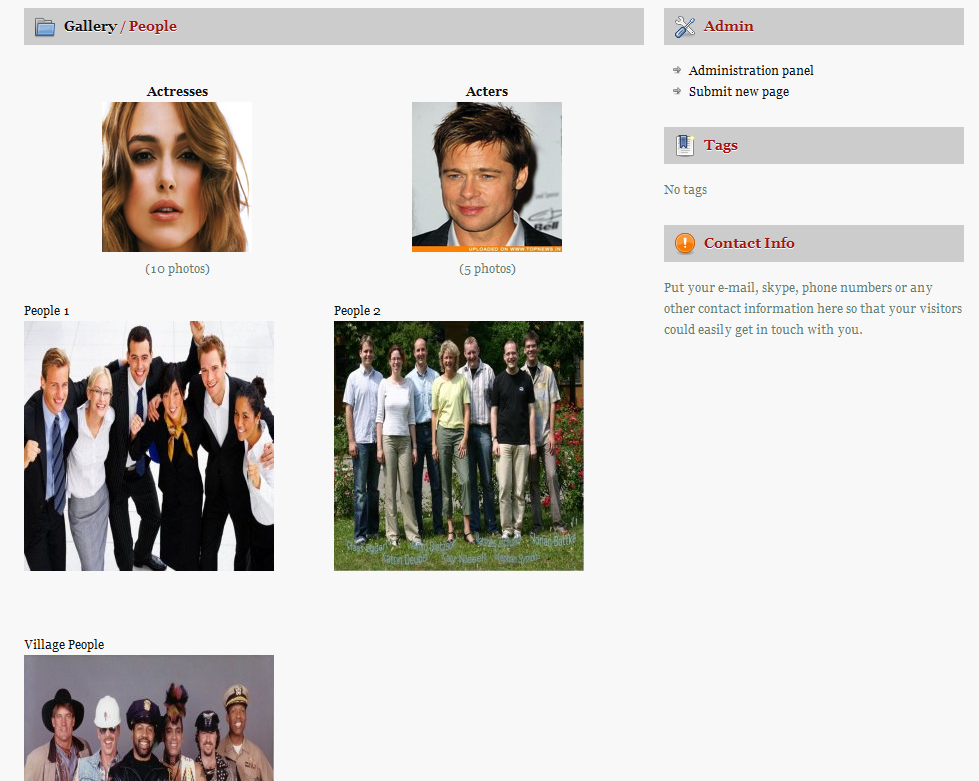
b. The look and feel how the subcategories are displayed in the list.
Replace
<!-- BEGIN: LIST_ROWCAT -->
	<h3><a href="{LIST_ROWCAT_URL}" title="{LIST_ROWCAT_TITLE}">{LIST_ROWCAT_TITLE}</a> ({LIST_ROWCAT_COUNT})</h3>
	<!-- IF {LIST_ROWCAT_DESC} -->
	<p class="small">{LIST_ROWCAT_DESC}</p>
	<!-- ENDIF -->
<!-- END: LIST_ROWCAT -->
by
<table style=" width:100%; text-align:center;">
	<col width=33%> <col width=33%> <col width=33%>
	<tr>
		<td style="background:transparent;">
			<div class="pagnav">{LISTCAT_PAGEPREV}{LISTCAT_PAGNAV}{LISTCAT_PAGENEXT}</div>
		</td>
	</tr>
	<tr>
	<!-- BEGIN: LIST_ROWCAT -->

		<td style="background:transparent;">
			<strong><a href="{LIST_ROWCAT_URL}">{LIST_ROWCAT_TITLE}</a></strong>
			<br />
			 <!-- IF {LIST_ROWCAT_ICON} -->
			<a href="{LIST_ROWCAT_URL}"><img src="{LIST_ROWCAT_ICON}" WIDTH=150 HEIGHT=150 ALT="Album: {LIST_ROWCAT_TITLE}" border="0" /></a>
			<br />
			<!-- ENDIF -->
			({LIST_ROWCAT_COUNT} photos)
			<br /><br />
			<!-- IF {LIST_ROWCAT_DESC} -->
			<span class="desc">{LIST_ROWCAT_DESC}</span>
			<!-- ENDIF -->
		</td>

		<!-- IF {LIST_ROWCAT_NUM} % 2 == 0 --> </tr><br /><tr> <!-- ENDIF -->

	<!-- END: LIST_ROWCAT -->

	</tr>
	<tr>
		<td style="background:transparent;">
			<div class="pagnav">{LISTCAT_PAGEPREV}{LISTCAT_PAGNAV}{LISTCAT_PAGENEXT}</div>
		</td>
	</tr>
</table>
The tumbnails of the subcategories I made smaller than the tumbnails of the pages, to see some difference.
De IF structure with the "% 2" means that each time 2 items are displayed he we start a new <tr>. So you are making rows of 2 items.
This you can change according to your wanted layout.
c. The look and feel how the pages are displayed in the list.
They will get a title and a tumbnail.
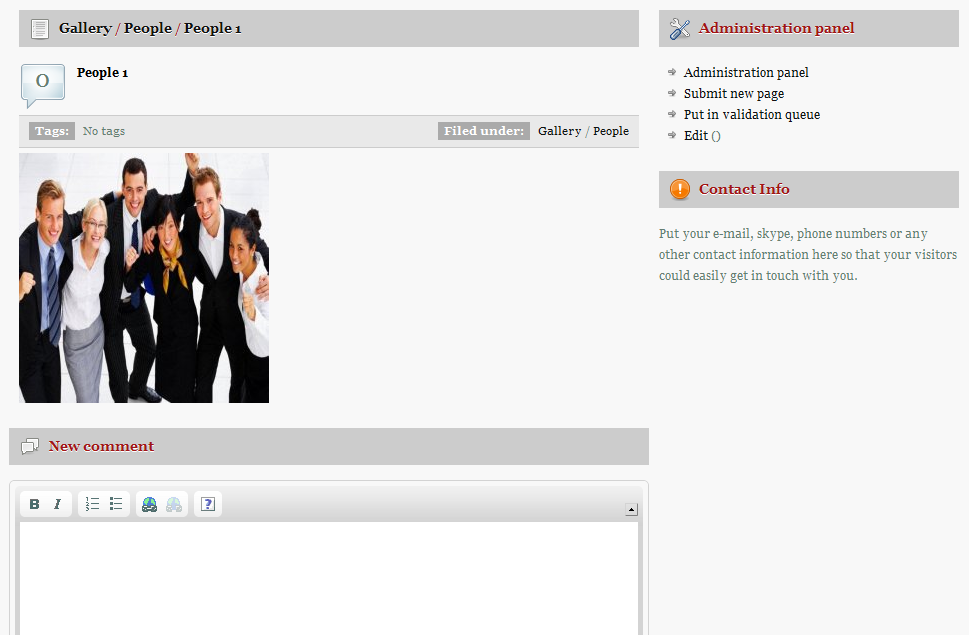
If you click on the title, you will go to the page itself, to add comments, ..
If you click on the thumbnail it will open in a fancybox-popup window.
Replace
<!-- BEGIN: LIST_ROW -->
	<h3>{LIST_ROW_TITLE}</h3>
	<!-- IF {LIST_ROW_DESC} --><p class="small marginbottom10">{LIST_ROW_DESC}</p><!-- ENDIF -->
	<!-- IF {PHP.usr.isadmin} --><p class="small marginbottom10">{LIST_ROW_ADMIN} ({LIST_ROW_COUNT})</p><!-- ENDIF -->
	<div>{LIST_ROW_TEXT}</div>
	<!-- IF {LIST_ROW_MORE} -->{LIST_ROW_MORE}<!-- ENDIF -->
	<hr />
<!-- END: LIST_ROW -->
by
<table >
<col width=33%> <col width=33%> <col width=33%>
<tr>
<!-- BEGIN: LIST_ROW -->
<td>
<a href="{LIST_ROW_URL}">{LIST_ROW_SHORTTITLE}</a><br \>
<!-- IF {LIST_ROW_AVATAR} --><a rel="example_group" href="../datas/photos/{LIST_ROW_AVATAR}" title="{LIST_CATTITLE} - {LIST_ROW_SHORTTITLE}"><img src="./datas/photos/thumb250_{LIST_ROW_AVATAR}" alt="{PAGE_SHORTTITLE}" /></a><br \><!-- ENDIF -->
<p style="width:250px">{LIST_ROW_TEXT}</p><br \>
<br \><br \>
</td>
<!-- IF {LIST_ROW_NUM} % 2 == 0 --> </tr><tr> <!-- ENDIF -->
<!-- END: LIST_ROW -->
</tr>
</table>
You can adapt your pages like you want, with comments, ratings, ...
Remember: A Photo is just a page.


this looks so cool
Will most certainly use this.
thx a lot Pieter!
9 times
Example can be found at: http://siena.broens.be/page.php?c=gallery
Not sure how long it will be there.
If someone is interested, I can upload the files to here.
@ pieter
yes please
9 times
Here they are
76 times
waiting for pageavatar 4.0
thx Pieter
@ esclkm
Why, what's so special about that?
76 times
custom crop for each thumb
76 times
new version http://littledev.ru/page.php?al=pageavatar4